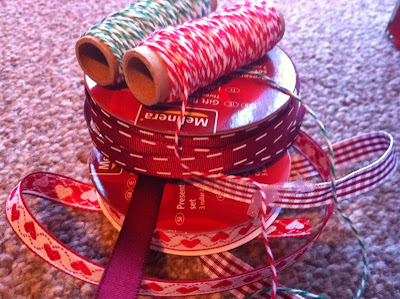
I've been doing lots of crafty things lately and thought I would share some of the projects with you. It's bonfire night here so the jacket potatoes are in the oven and we are getting ready to brave the cold to have a mini display in our garden!
I have stumbled upon loads of great blogs and stores lately that have really inspired me to get making. I would highly recommend looking up:
Studio Calico
Trimcraft UK
We R Memory Makers
Glitz Studio
They all feature different crafters and have some really good ideas, and some equally good giveaways.
We just found out that we are going to run a jam stall at a local Christmas fair this month so we have been collecting fruit and thinking of recipes/decoration to make the jars all Christmassy. Our local TKMAXX never fails to provide for us, and we found a pack of fat quarters that are going to go really far and were a real bargain. If you want to make festive toppers for your jams; here is how I did it.
 |
| Check the size of your jam jars to make sure your fabric will cover it |
 |
| I cut out squares, but circles work too! I got those pinking shears a while ago for only £8 at IKEA |
 |
| Make sure you have elastic bands and labels for your jars. |
 |
| Get some festive ribbons (Lidl) and Bakers twine (The Range) |
 |
| Secure your fabric with the elastic bands & tie around your ribbon. |
 |
| Don't forget your labels! |
I have also been prepping some things to make my first proper scrapbook to keep all my memories from my internship in one place. Most things are on my Christmas list but I did manage to find an absolute bargain in TKMAXX that I am using to create my own journalling/scrapbooking cards:
 |
| The papers are really cute, and they came with a couple of large sheets that had cards ready to be cut up. |
 |
| I used a template from a Project Life printable to cut out my own cards |
I don't have loads of paper punches because they are quite expensive so I used cookie cutters to cut out my own shapes for the rest! This entire pad was on sale for £4.
The last thing we did (although I didn't really help that much) was use some really cheap wood to put together some tapes and ribbons storage. I'd seen loads of things on instagram that were really fancy but expensive so I tried to think of a way to make something cheaply that I could decorate. Here's what we came up with:
 |
| I decorated this one with the Washi tape I won from Artsyville |
 |
| I used was a couple of sample pots to paint them from B&Q where we bought the wood. |
The piece of wood was sawn in half, and the dowel was sawn into three (we had two pieces). Three holes were drilled into each piece of wood and were secured with a screw. It was really easy to watch haha. It took about 15 minutes to make them and not so long to decorate so I'd recommend this as an easy project that will create some cute storage that you can really make your own!
Any kind of craft whether it be scrapbooking, card-making, decorating, Project Life etc can easily get so expensive, but there are loads of ways to make it more affordable. I would say maximise your creativity to use what you have rather than over-paying for things that you might not actually need.
Happy Crafting!
Much Love xxx


Post a Comment
Please feel free to add your comments here...